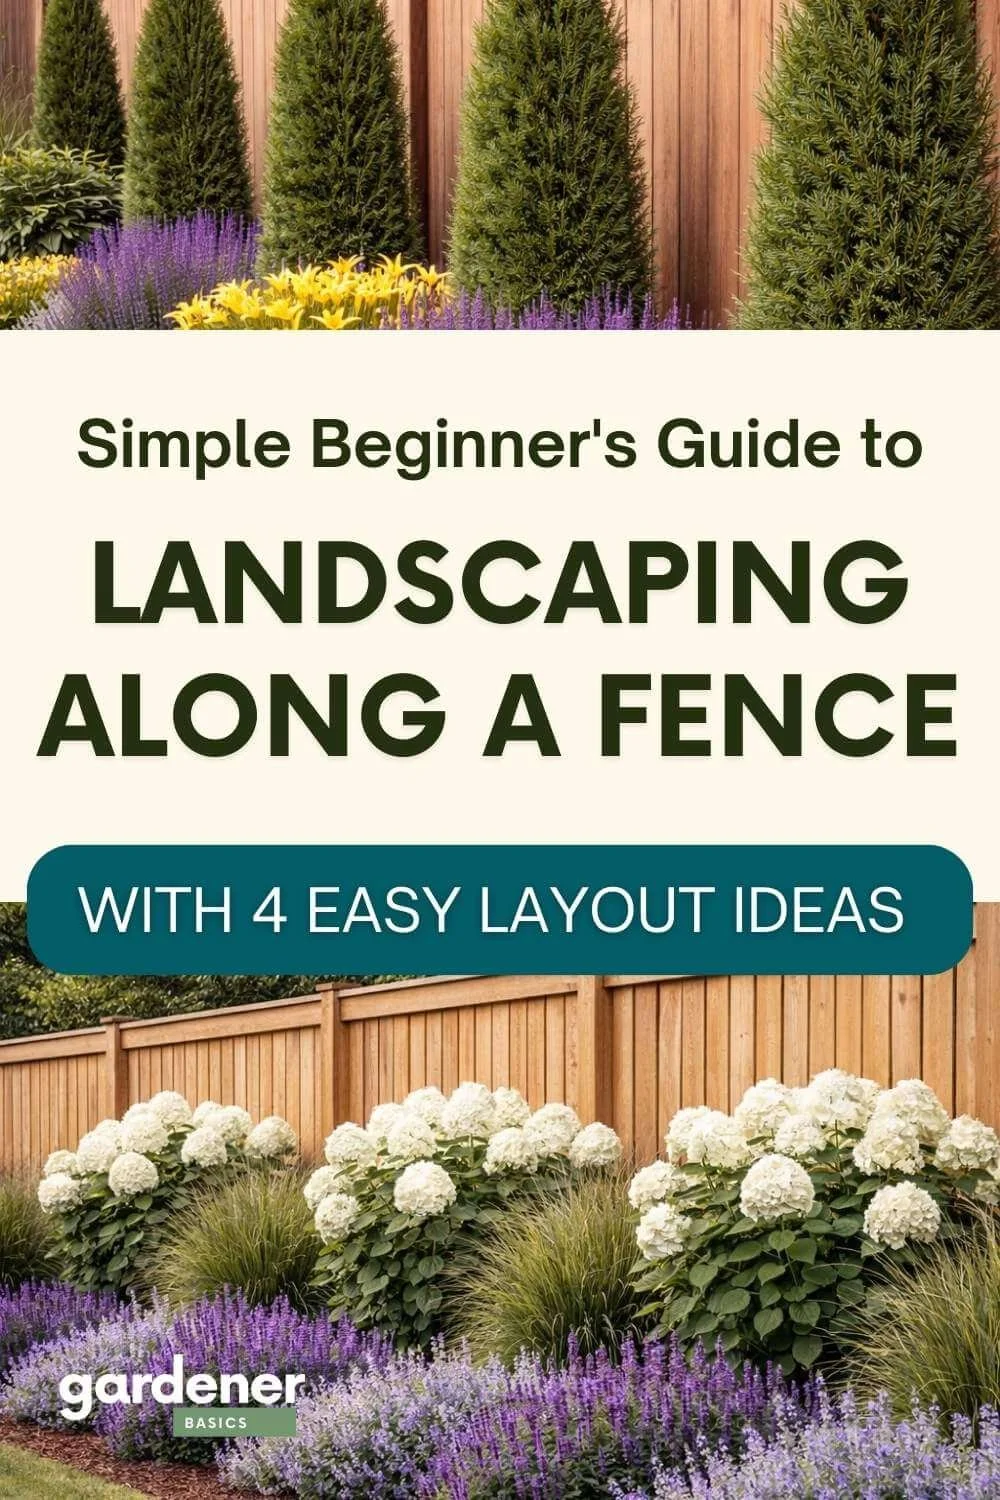
Landscaping Along a Fence: Easy Layouts + Best Plants (With Care Tips)
If you have a fence in your yard, you already have the perfect “backdrop” for a gorgeous garden border… even if it doesn’t feel like it right now.
Most fences look a little harsh on their own—like a long wooden wall. But the second you soften that line with layered plants (the right way), the whole yard starts to look finished. Like you hired someone.
And the best part? You don’t need a complicated design plan or 47 different plants. You just need:
a layout that fits your space
plants that like the same sun + water
and a simple care routine so it stays looking good
I’m going to walk you through the easiest fence landscaping layouts you can copy, plus the best plant pairings (with care tips that actually make them thrive).
The items listed are accompanied by affiliate links, meaning I earn a small commission if a purchase is made through my links. This has no impact on the cost to the consumer. I link to products this way whenever possible, and it has no bearing on the products I choose to review or recommend.
Table of Contents Hide
Start Here: What to Measure Before You Plant
Step 1 — Check sun along the fence (don’t guess)
Fence lines are sneaky. One side can be blazing hot, while the other stays cool and shady most of the day.
Take a quick look over a sunny day:
Full sun: 6+ hours of direct sun
Part sun/part shade: 3–6 hours
Shade: less than 3 hours (or bright indirect light only)
This matters because the prettiest combo in the world won’t work if one plant needs sun and the other melts in it.
Step 2 — Measure bed depth (this determines your layout)
Grab a tape measure. The depth of your planting area changes everything.
Narrow: 18–30 inches
Standard: 3–5 feet
Deep: 6+ feet
If you’re narrow, you’ll go vertical and compact. If you’re standard or deep, you can layer plants for that “designed” look.
Step 3 — Leave a little breathing room from the fence
Plants shoved right against a fence tend to:
get mildew (less airflow)
scrape the fence and look messy
make it harder to stain/repair the fence later
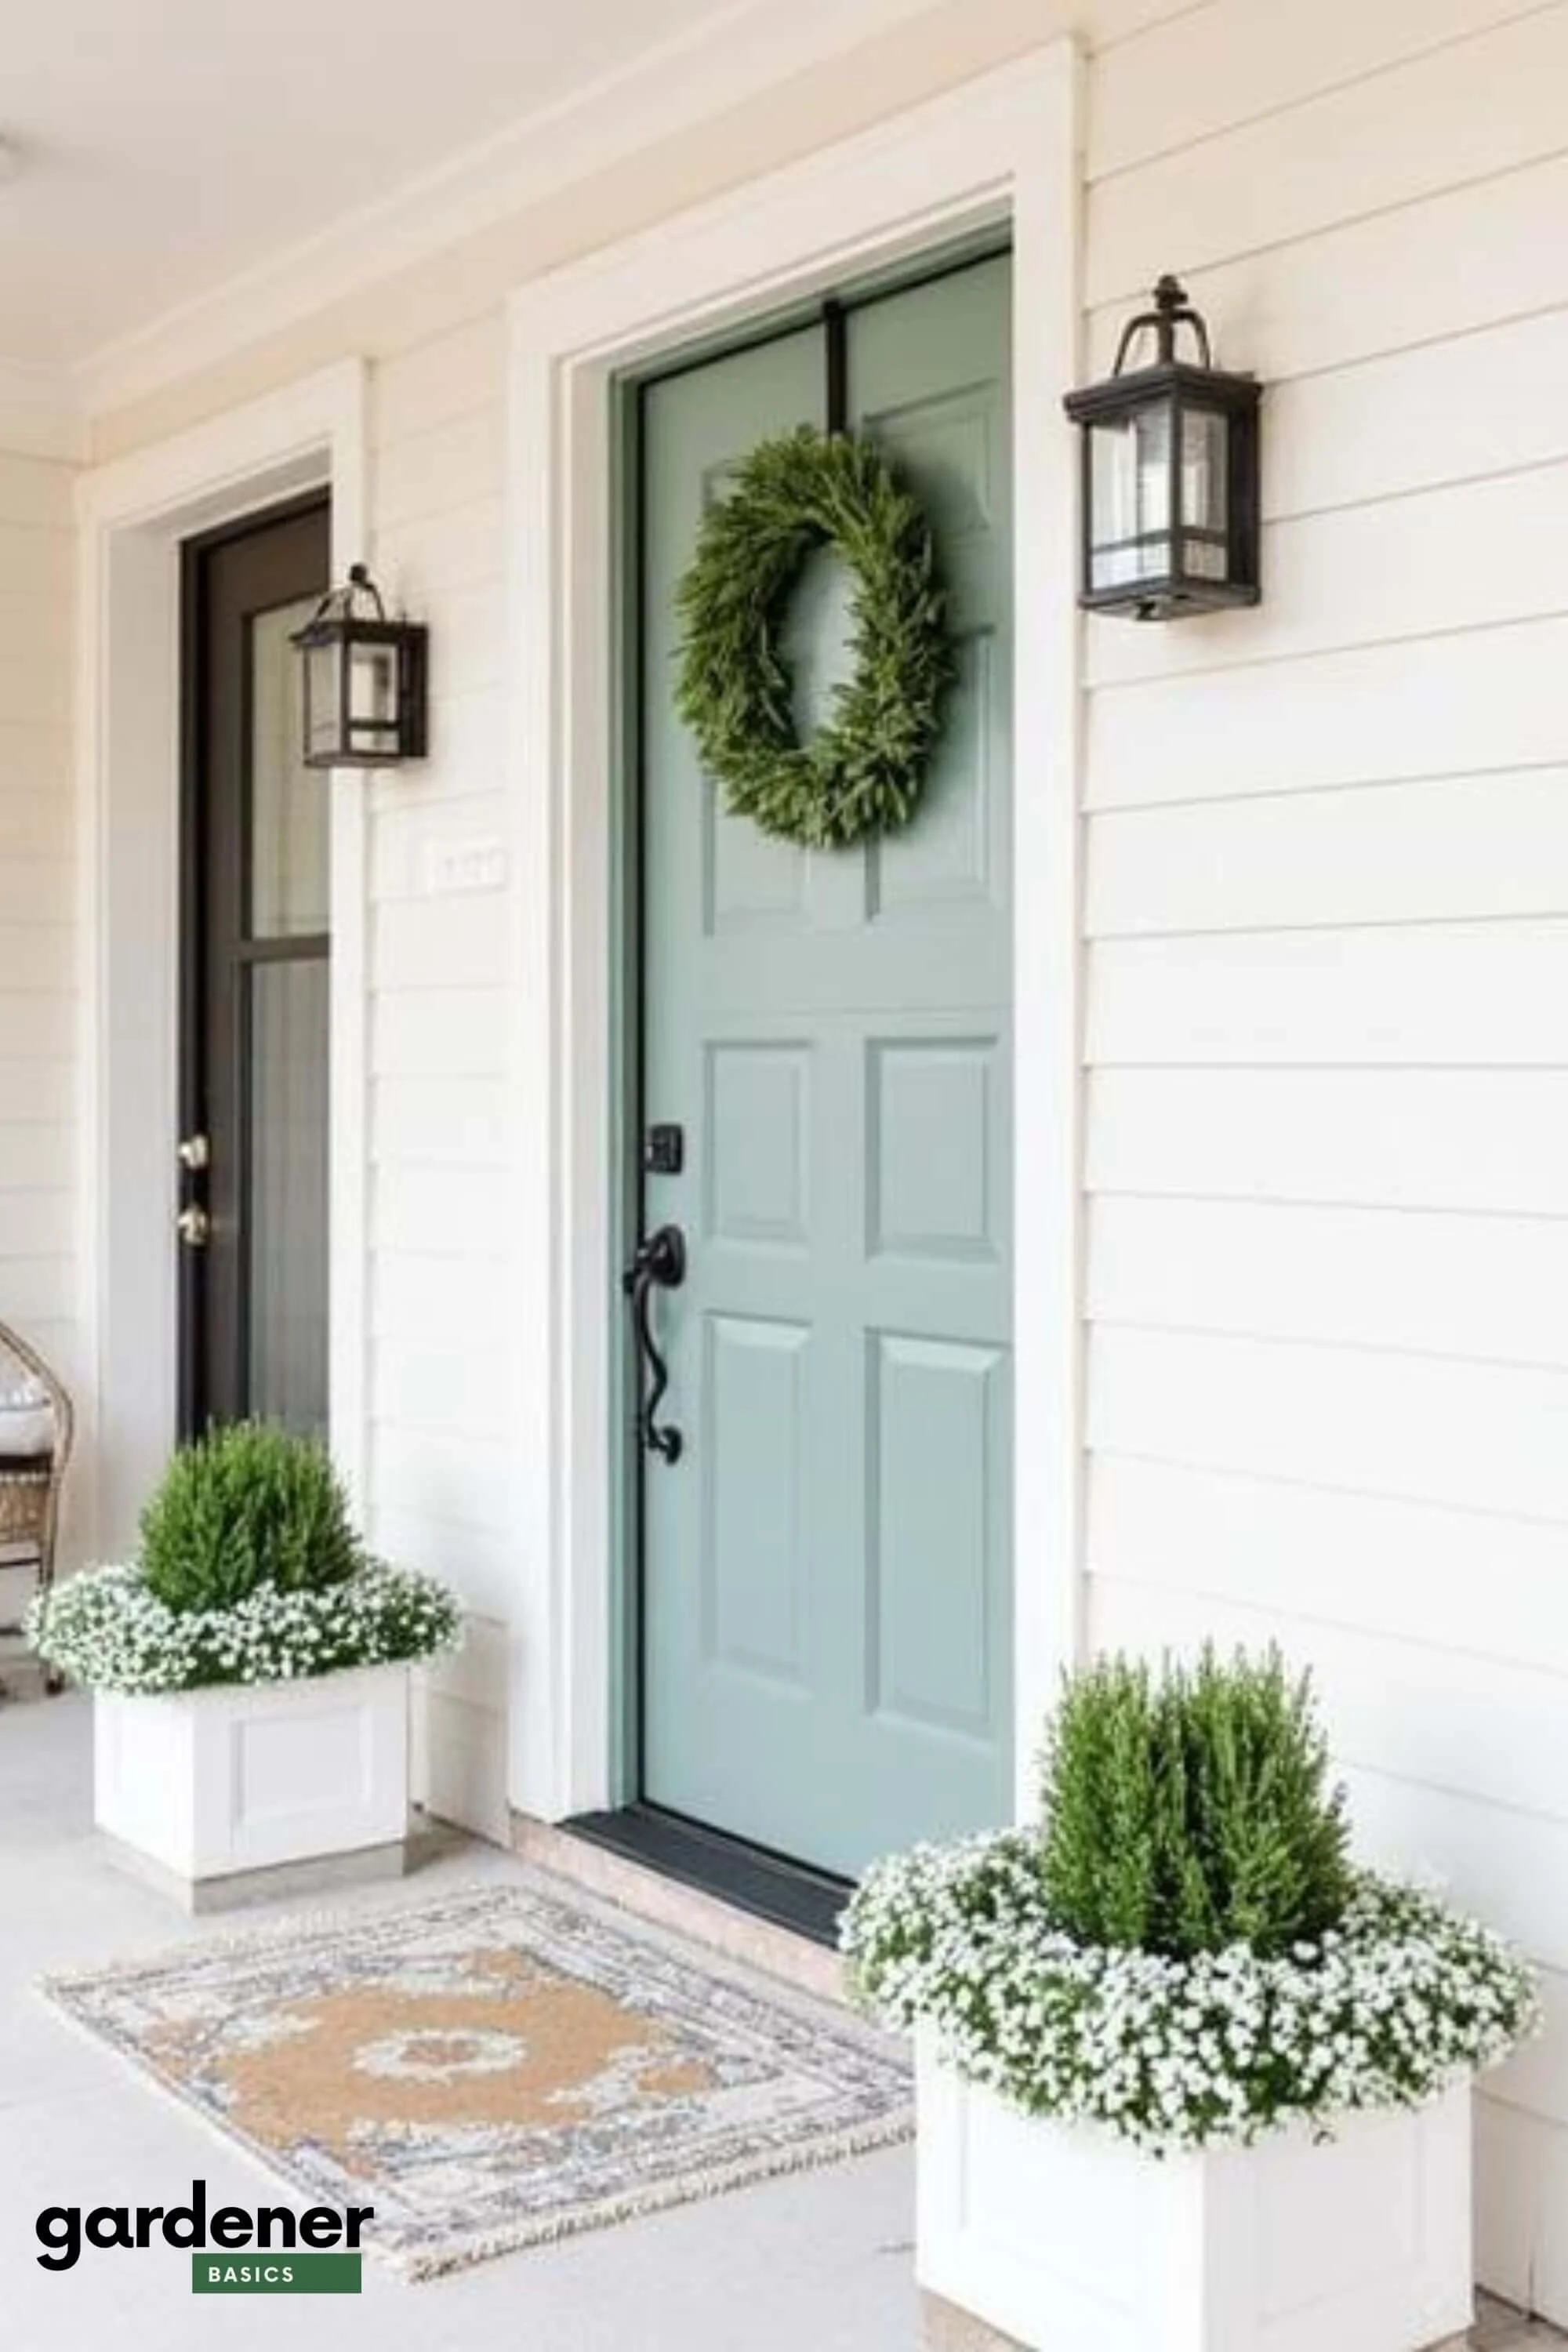
Even if you’re working with a tight bed, aim to keep plants slightly forward instead of hugging the fence.
Step 4 — Pick your “look”
This is the fun part. What vibe do you want?
Classic + full: layered border
Modern + tidy: repeating rhythm layout
Small-space: narrow bed solution
Romantic: cottage garden overflow
Shady + lush: shade border that still pops
Choose Your Fence Landscaping Layout (Easy Options You Can Copy)
Pick the one that matches your space and the feel you want. I’ll give you a “recipe” for each so you’re not guessing.
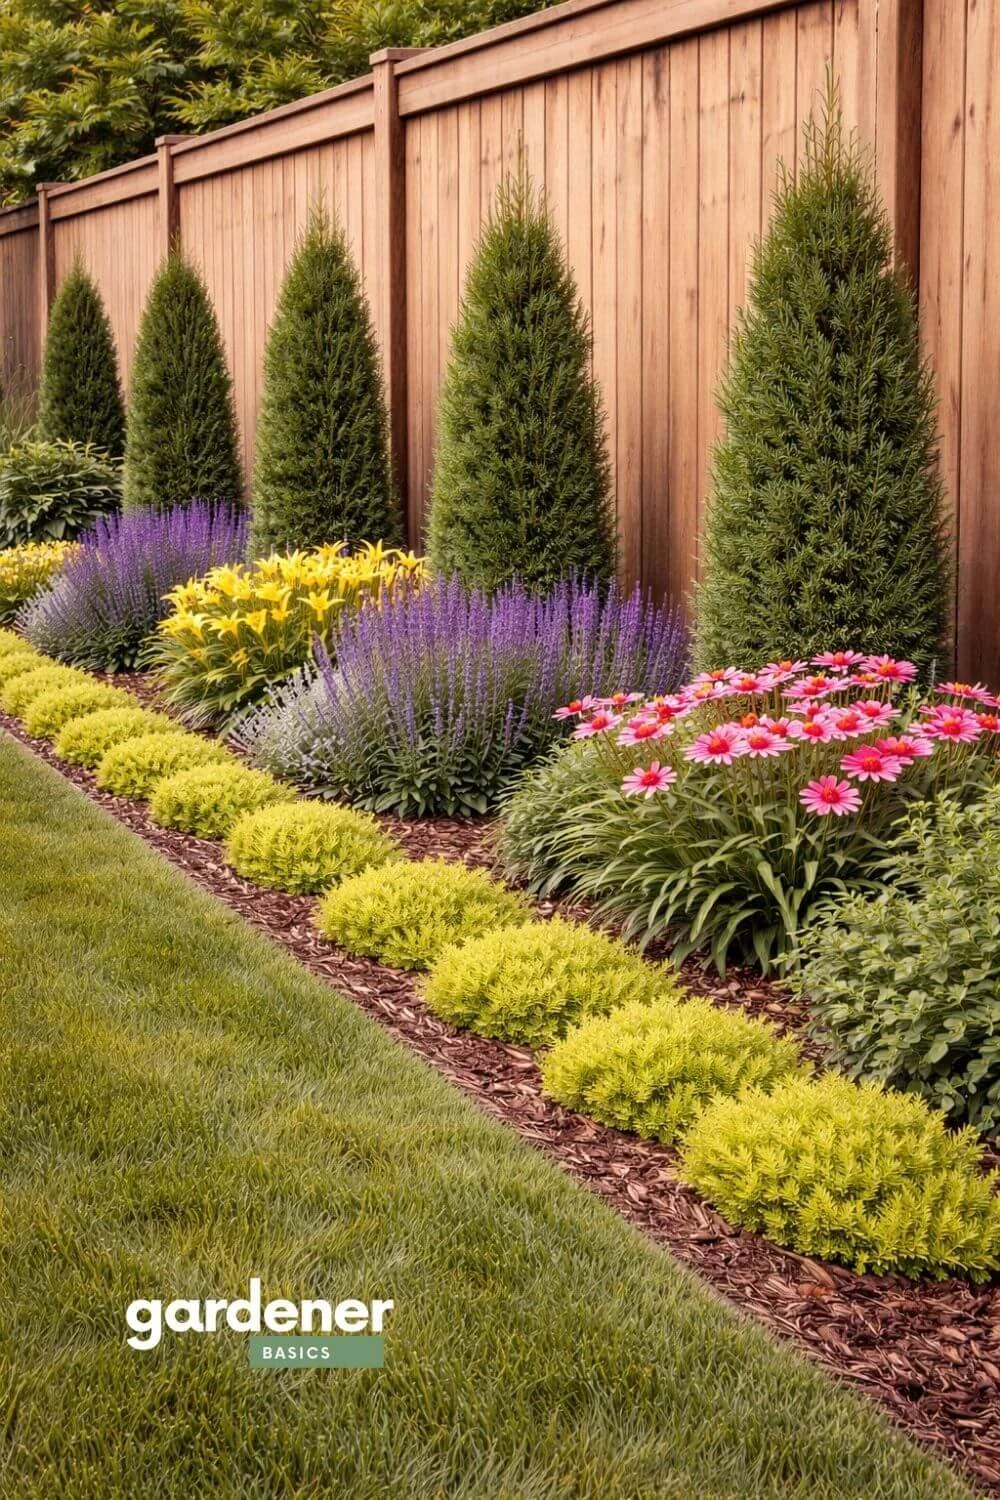
Layout 1: The Classic Layered Border
Best for: 3–8 foot deep beds
Vibe: full, soft, “this looks professionally planted”
Why it works: it uses height layering so the fence disappears behind greenery and blooms
Planting Recipe Card (Best for Most Fences)
Back row (tall anchors):
Choose one main anchor and repeat it:
Panicle hydrangeas OR
Arborvitae OR
Tall ornamental grasses
Middle row (color + fullness):
Pick 2–3 and repeat in clumps:
Salvia
Coneflower
Catmint
Front edge (neat finish):
Pick one and repeat along the whole edge:
Sedum
Creeping thyme
Heuchera (great if you want foliage color)
If you’re a visual person like me, I’m including simple mock-ups so you can picture each layout along a real fence before you plant.
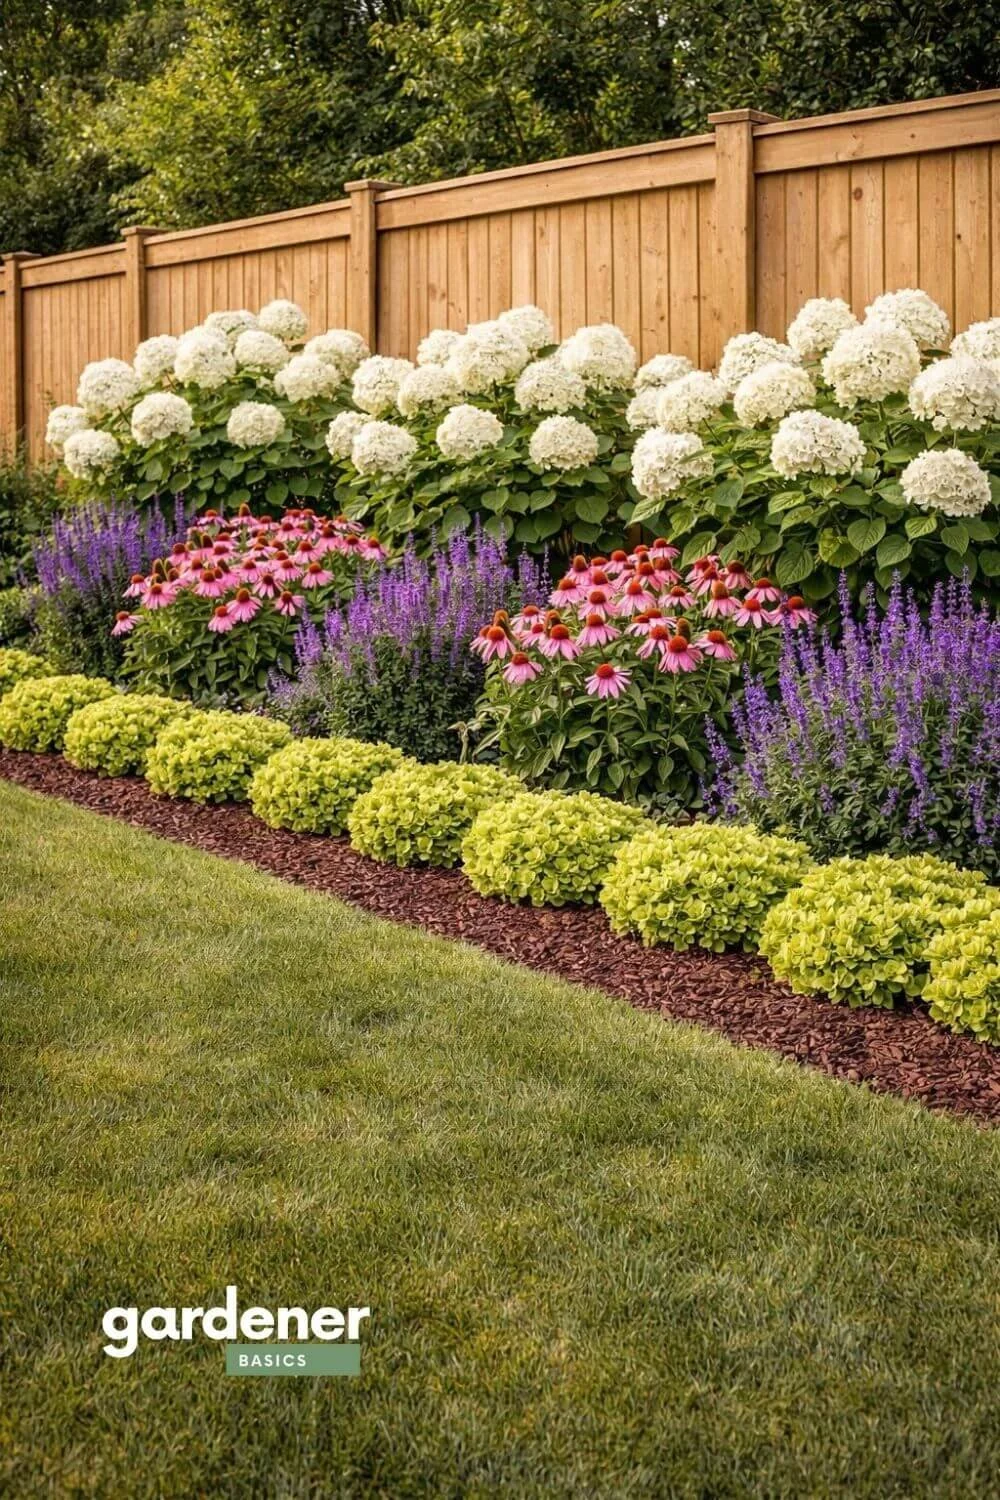
The Classic Layered Border
Easy care notes
Water consistently your first season while roots establish
Mulch 2–3 inches to reduce weeds and keep moisture steady
Deadhead bloomers (like salvia) to keep flowers coming
Layout 2: The “Rhythm” Layout
Best for: people who love clean repetition
Vibe: modern, simple, always looks intentional
Why it works: repetition is the secret weapon—your eye reads it as “designed”
Planting Recipe Card (Modern & Tidy)
Repeat this down the fence:
Anchor shrub (every 4–6 feet):
Panicle hydrangea (white blooms look extra clean in modern designs)
Between the anchors:
Ornamental grass (adds texture and movement)
In front (repeat in groups):
Catmint + salvia
(You can do all one color palette if you want it very modern.)
Here’s a quick visual of this layout along a fence.
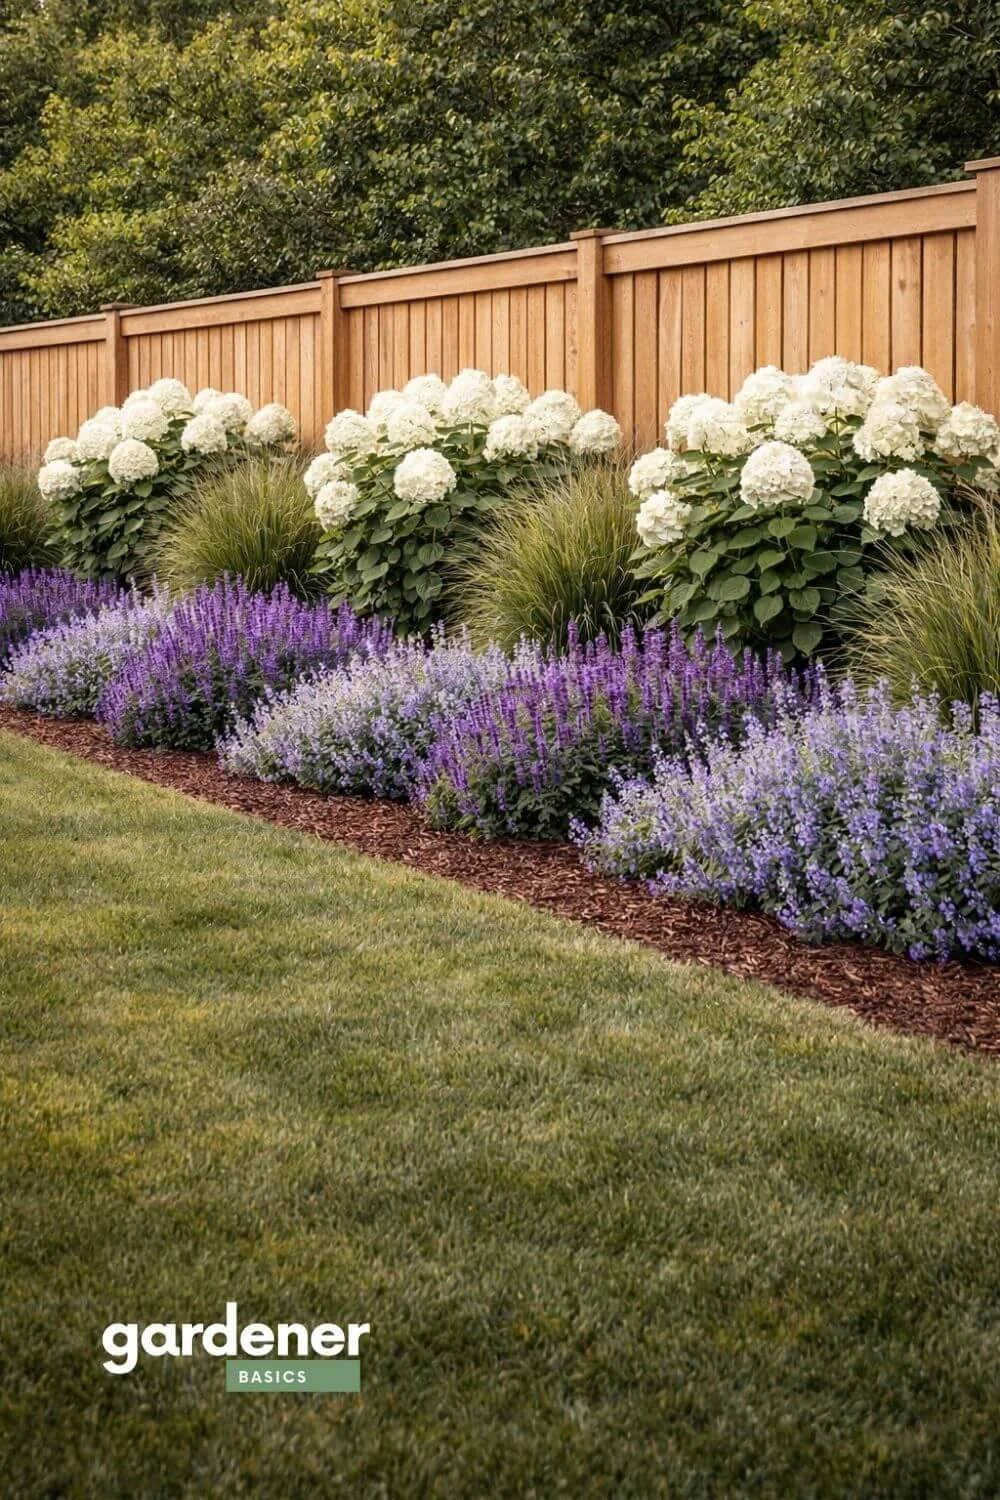
The “Rhythm” Layout
Easy care notes
Keep the front edge clean with mulch or a crisp border
Cut ornamental grasses back in late winter/early spring
Trim perennials after their main bloom flush to keep shape tidy

Layout 3: Narrow Bed Solution
Best for: skinny strips, side yards, tight spaces
Vibe: clean, vertical, surprisingly lush
Why it works: you’re using upright plants that don’t sprawl into the lawn
Planting Recipe Card (narrow-friendly)
Vertical “posts” (repeat):
Columnar evergreen (slim and upright)
Compact bloomers (clumping plants):
Salvia
Daylilies
Compact coneflowers
Front edge (bright + tidy):
Sedum ‘Angelina’ (or any low, neat groundcover)
Here’s what this might look like along a fence.
Narrow Bed Solution
Easy care notes
Narrow beds can dry out faster than you’d expect.
Mulch matters here
Water deeply during dry spells (especially year one)
Choose clumping plants over sprawlers so it stays neat
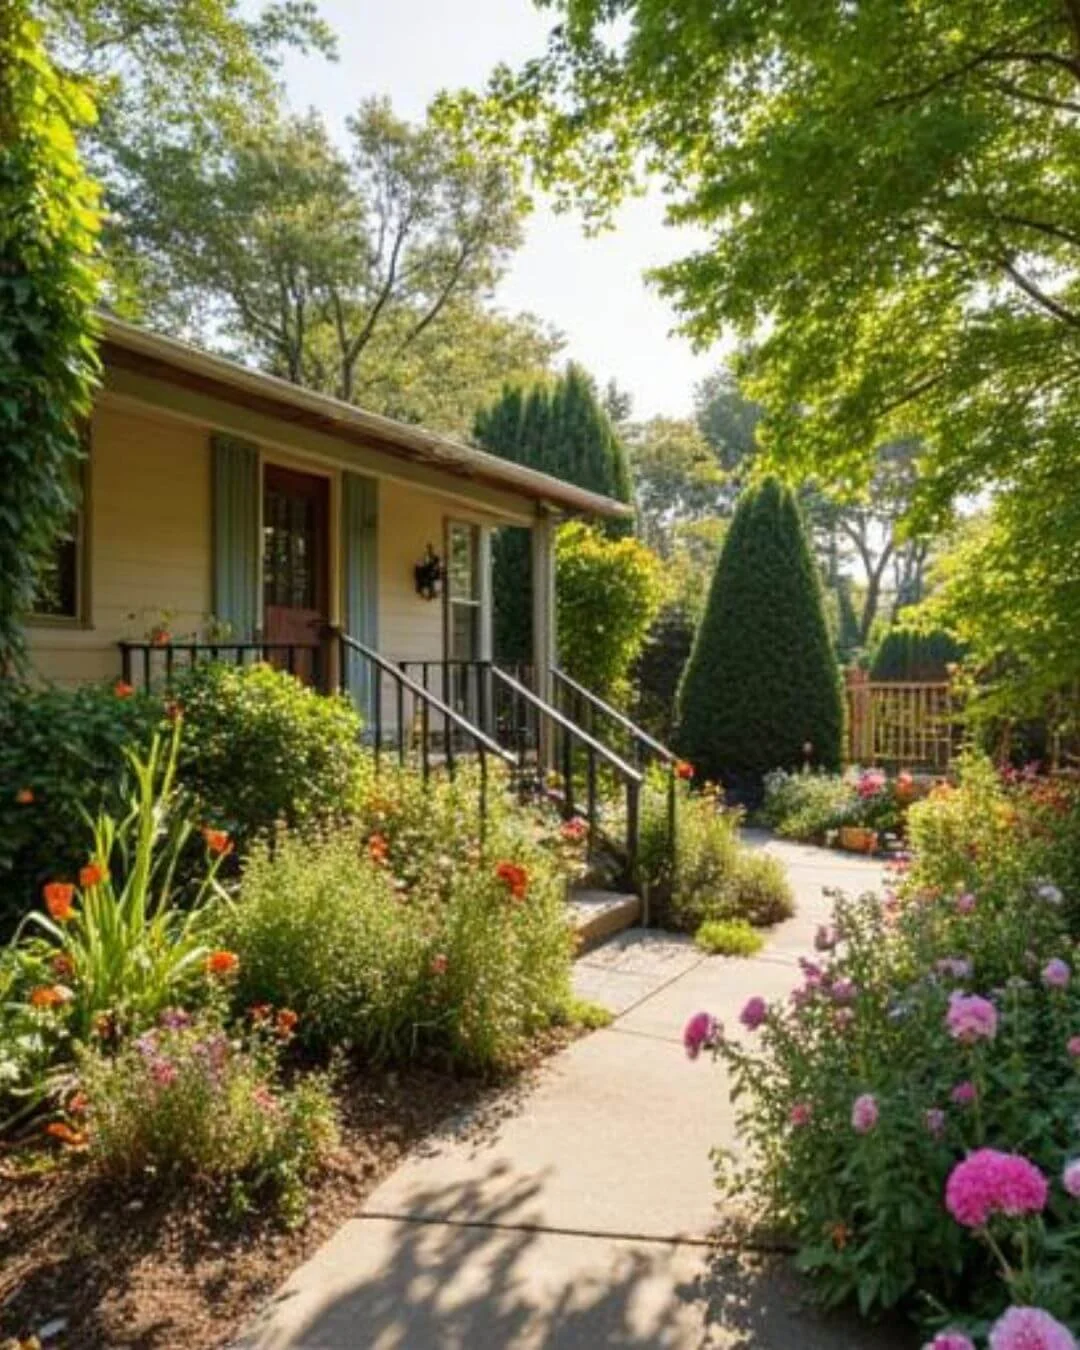
Layout 4: Cottage Garden Fence Border
Best for: people who want “flowers everywhere”
Vibe: charming, abundant, storybook garden
Why it works: tall blooms against the fence, then layers that spill forward
Planting Recipe Card (romantic + layered)
Back row (tall + dramatic):
Hollyhocks
Climbing roses or clematis
Tall phlox
Middle row (classic blooms):
Peonies
Daisies
Coneflower
Salvia
Front edge (spill + soften):
Creeping phlox
Hardy geranium
Catmint
This mock-up helps you see the layers at a glance.

Cottage Garden
Easy care notes
Cottage gardens look carefree… but they need a little structure.
Include 1–2 “anchors” (like roses or repeated tall plants) so it doesn’t turn chaotic
Stake taller plants early if needed (before they flop)
Thin crowded areas for airflow
Layout 5: Shade Fence Border
Best for: north-facing fences, tree-heavy yards
Vibe: rich, layered greenery with pops of color
Why it works: foliage texture does the heavy lifting in shade
Planting Recipe Card (Lush & Bright)
Back row (shrubs for structure):
Hydrangea (shade-tolerant types work best)
Inkberry holly (evergreen option)
Middle row (lush perennials):
Hostas
Astilbe
Brunnera
Ferns
Front edge (fills bare soil):
Sweet woodruff
Ajuga
Lamium
Here’s a simple visual of the planting recipe.
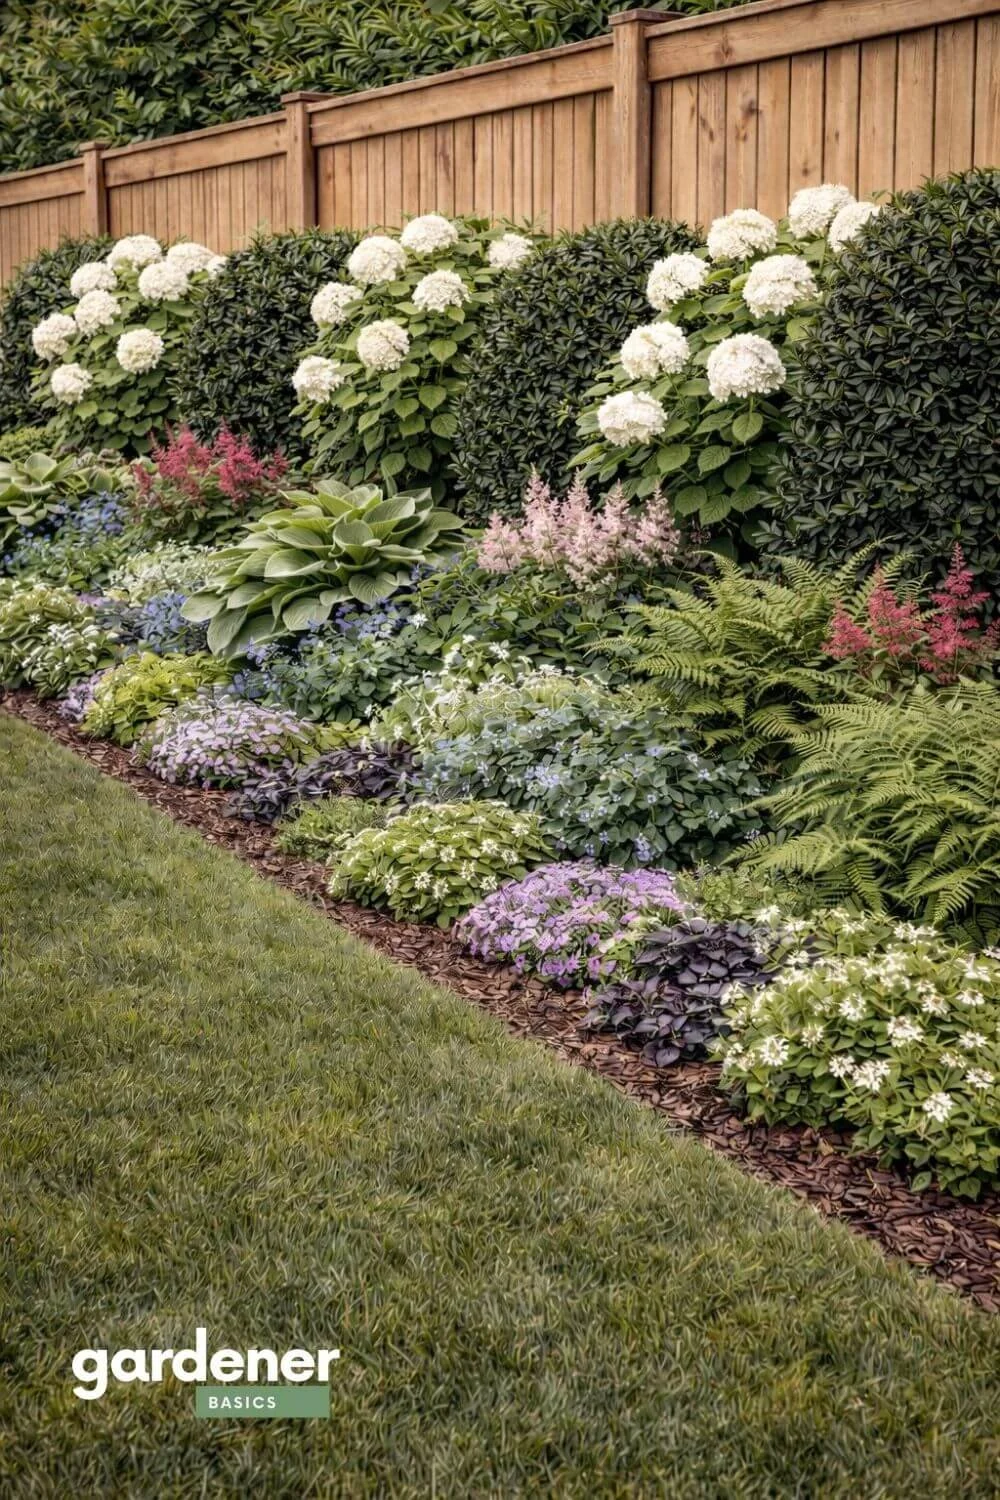
Shade Border
Easy care notes
Shade beds often stay damp longer.
Great for shade plants, but watch for slugs
Don’t overcrowd (airflow still matters even in shade)
Mulch lightly to keep moisture even
Best Plants for Fence Borders (By Sun + Maintenance)
If you want to keep this super simple, pick plants from the list that matches your fence’s sun level—then repeat them in groups.
Full sun favorites (tough + long bloom)
Salvia
Coneflower
Catmint
Sedum
Ornamental grasses
Part sun favorites (balanced, easy)
Hydrangeas (type depends on sun)
Daylilies
Black-eyed Susan
Heuchera
Shade favorites (lush + reliable)
Hosta
Astilbe
Brunnera
Ferns
Sweet woodruff / ajuga / lamium (groundcovers)
Care Guide for Fence-Line Plantings (So It Stays Pretty)
This is where beginners usually panic—so I’ll make it simple.
Watering: year one vs established
Year 1: water deeply 1–2x/week (more during heatwaves)
After that: most established perennials only need watering during dry spells
If you’re unsure: stick your finger into the soil a couple inches. If it’s dry, it’s time to water.
Mulch: the low-maintenance cheat code
Mulch does three huge things:
keeps weeds down
holds moisture
makes the bed look finished
Use 2–3 inches and keep it away from plant stems.
Pruning basics (quick and non-scary)
Ornamental grasses: cut back in late winter/early spring
Salvia/catmint: shear lightly after blooming to encourage new growth
Hydrangeas: depends on type—don’t prune blindly (some bloom on old wood)
Seasonal checklist
Spring: clean up, refresh mulch, prune where needed
Summer: deadhead, water during dry spells, check for mildew in crowded areas
Fall: cut back messy perennials
Winter: brush heavy snow off shrubs, leave some seed heads if you want winter interest
Common Fence Border Mistakes (and How to Fix Them)
Mistake 1: Planting one of everything
Fix: choose 3–6 plant types and repeat them.
Mistake 2: Overcrowding
Fix: give plants mature-size space. Crowding = mildew + flop.
Mistake 3: Mixing water needs
Fix: don’t pair drought lovers (lavender) with thirsty plants (hydrangea) unless you’re okay micromanaging watering.
Mistake 4: No front edge
Fix: add a neat edging plant or groundcover. It’s the difference between “random plants” and “landscaped bed.”
FAQ
How wide should a fence planting bed be?
If you can: 3 feet minimum for layering. But narrow strips can still look amazing with vertical plants.
What’s the easiest layout for beginners?
The Classic Layered Border because it’s forgiving and looks full fast.
How do I make it look expensive?
Repeat plants in groups, limit your color palette, and add structure (shrubs or grasses).
What if my fence is mostly shade?
Lean into foliage (hostas, ferns, heuchera) and use shade shrubs for structure.
Pin for later>>